Sub-Grading Is a Critical First Step in Driveway Paving

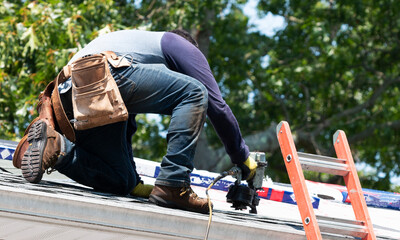
Your driveway should be a safe and welcoming entrance to your home. It should also be well-designed to ensure that water drains away from the pavement effectively. SC Driveway Paving Charleston can add to the resale value of your property and enhance your overall curb appeal. Driveway paving materials can be poured concrete, asphalt, pavers, or gravel.

driveway paving

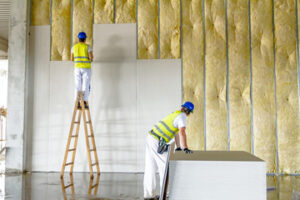
If you want a long-lasting, durable, good-looking asphalt driveway, you must build it on a solid foundation. That’s why sub-grading is a critical first step in any paving job.

The subgrade is the native soil under a roadway, pavement, or driveway. It’s also known as the formation level. Ideally, the subgrade is structurally sound and properly compacted, but this is only sometimes possible.

The subgrade is often weakened by poor construction techniques and climatic conditions such as excessive moisture or freezing/thawing cycles. The subgrade must have a high load-bearing capacity and be able to resist volume changes. Otherwise, it can lead to settlement and damage to the completed pavement structure.

The ideal sub-grade is a well-compacted, dense material free of soft spots, ruts, and depressions. It must be strong enough to support the traffic loads transmitted through the complete pavement, including truck traffic. , a soil test should be conducted, and a professional engineer should review the results To ensure that your sub-grade can meet these requirements. 

A common technique for preparing the subgrade is to install a geotextile fabric on the ground surface. This inexpensive step is often overlooked and can make a huge difference in the longevity of your new driveway.

During the R&R process, the old driveway will be completely ripped out to the subgrade, covered with the geotextile fabric, and rebuilt with 10 inches of runner-crush stone in two lifts. Dependable Paving uses 1″ minus stone, similar to runner-crush, but has been screened to allow stones 1 inch and smaller to pass through. The sub-base should be spread evenly and compacted thoroughly, and the sub-grade must be firmly in place before proceeding to the binder course.

As its name suggests, the sub-base is the material layer underneath your final paving surface. It’s typically made from granular materials, such as crushed stone or gravel, and is installed at the base of your pavement before the asphalt is laid. It acts as the primary load-bearer, spreading the pressure from the Paving onto the underlying soil or aggregate.

It also helps prevent water from pooling beneath the Paving and eroding it over time, reducing the amount of moisture retained in the ground and causing it to become saturated and damp. It is particularly important on steeper gradients, where drainage problems can occur.

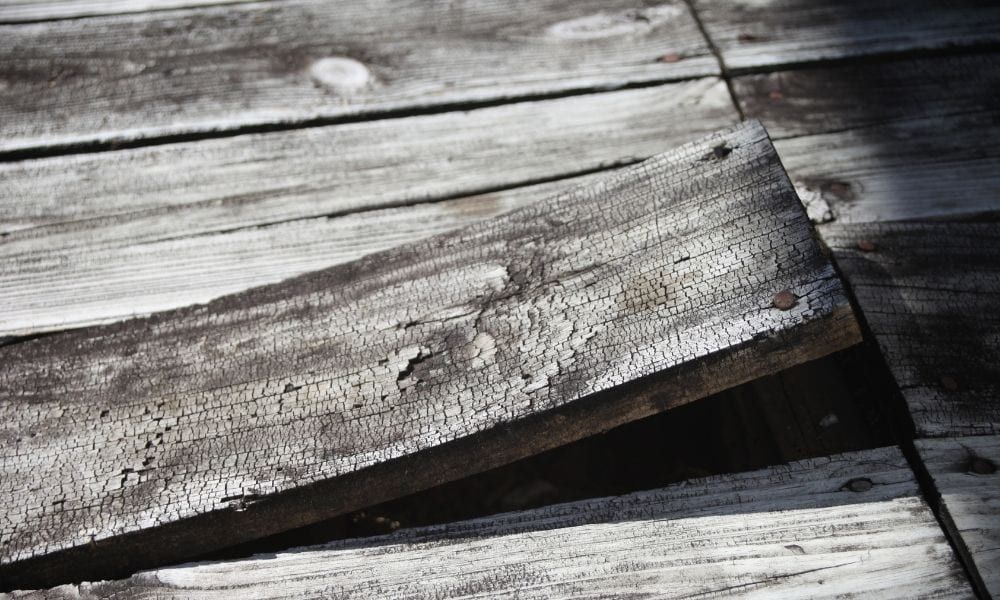
Sub-base is important because it is a key component in the overall structural integrity of your driveway. A faulty or low-quality sub-base is the primary reason that many people find that their new paved surfaces begin to shift, sink, and crack over time.

Using a high-quality sub-base, such as MOT Type 1 (or ‘DOT’ type in the US) is important. This crushed stone has been approved by the Ministry of Transport and is designed for use on roads and highways. It’s strong and stable, making it ideal for supporting Paving. It also drains well, which prevents water accumulation beneath your finished Paving.

A proper sub-base is usually 4 inches thick and must be carefully fine-graded and compacted with vibratory compaction equipment. Dependable Paving typically uses two lifts of sub-base on every paving job, starting with 8 inches of minus-4 runner-crush and finishing with a 2-inch bang of regular runner-crush.

The binder course is the first layer of asphalt installed. Also called the base coat, this layer rests on the prepared runner-crush stone base and utilizes bigger aggregate pieces than those used in all other coatings. This layer is very important as it is the load-bearing section of the pavement. Hence, it must be strong enough to handle heavy vehicles for as long as the roadway will last.

The paving company must also use a high-quality binder for this Course. Several tests are carried out to ensure the asphalt binder is good quality. These include the needle penetration test and its variations, which measure how far a lightweight needle can penetrate an asphalt mix. These empirical tests have serious limitations but can indicate an asphalt binder’s stiffness.

Asphalt binders are complex materials that are difficult to test and specify. As a result, there is a major effort to develop standard test methods and effective specifications.

For instance, the Strategic Highway Research Program (SHRP) developed a system of performance grading specifications known as Superpave in the early 1990s. These incorporated climate and pavement temperature data to determine which asphalt binder should be used on a specific project. A performance-graded binder specified for a site must meet a minimum reliability of 98% at both its maximum and lowest design temperatures.

An alternative to using a traditional asphalt binder is recycled rubberized concrete (RAC). This material is made by blending ground-up tires with conventional asphalt materials to create an asphalt product that can be used for roads and parking lots. RAC is an environmentally friendly, low-cost material with the same benefits as traditional asphalt.

A full-depth two-layer paving system is ideal for asphalt driveways because it offers strength, flexibility, and durability. The first Course of the 25mm Base Course is installed and compacted; once it’s cooled, a 9.5mm Wearing Course is laid and rolled, then consolidated again to create the final surface of your new driveway. This technique results in a stronger, more durable, and longer-lasting finish than any other type of paving material.

A concrete apron is sometimes used at the end of a driveway connecting to a road. It helps prevent any surface distortion where the driveway meets the road or another type of material. However, Dependable Paving always recommends an asphalt apron as it provides superior performance and durability over a concrete one.

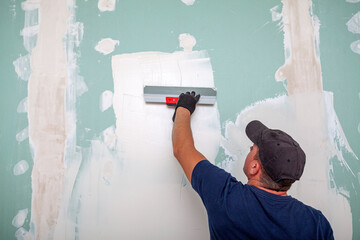
The topmost layer of the pavement is called the surface or wearing Course. This layer is designed to come into contact with traffic and provides a smooth, noise-reducing, and visually pleasing driving surface. This asphalt is usually made from a finer aggregate than the binder and also incorporates some stone (rather than being an all-sand mix) to reduce the potential for segregation and low in-place density that can result in punching depressions, rutting, and premature failure.

It is when the paving contractor repairs any serious holes, potholes, or other trouble areas with Hot Mix Asphalt and levels it out before the finishing Course is applied. The leveling course is also a great opportunity to consider using porous asphalt. It uses coarse aggregates that allow rain and melting snow to drain through the pavement instead of pooling on top of it. It is a great way to help protect the environment and reduce your water bill!

During this phase, the sub-base is compacted and graded to ensure it’s strong enough for the top layer of asphalt. Soft spots may also be discovered at this time, and steps will be taken to address them before moving on to the surfacing stage.

Once the paving process is complete, it’s important to have good drainage performance. Any water that pools on or near the surface can cause damage in various ways. The best way to prevent this is to have good grading on the new asphalt so that water runs off it and down into drainage channels or other areas.

In addition, the surface should be properly sloped so it doesn’t pool or run off onto adjacent driveways, sidewalks, or roads. It will improve weight transfer and allow for a more comfortable drive over the surface.

A transitional zone is a region that cannot be assigned to either urban or rural space use due to its diverse method of use. This study identified the location and shape of such a zone in Olsztyn and its outskirts, which are directly exposed to the impact of urbanization pressure.

The study’s goal was to define the transitional zone by using a mathematical approach based on fuzzy models. The results show that the defining characteristic of such a zone is that its functions reach the degree of membership interval of 0.5. This value, which represents the border between the urban and the rural locale, can be defined as the complement to u = 1 of the urban function. The method developed is a tool for identifying and locating the transitional zone employing topographic maps, enabling the preparation of cartographic compilations that present the full image of the study area.

Social Media Marketing Agency

Social Media Marketing Agency provides a range of online services. They help companies build their social media presence and improve engagement. They also offer consulting and training. A strong value proposition is key to attracting clients. It is a concise statement that clearly communicates your unique value to potential customers. It can also set you apart from competitors.

Iman Gadzhi’s Six-Figure SMMA Course

Social Media Marketing Agency

Iman Gadzhi Six Figure SMMA Course is an online course that teaches you how to create a social media marketing agency. It includes training videos, a private Facebook group, live Q&A coaching calls twice weekly, and marketing funnels for gyms, real estate, and restaurants. Iman Gadzhi Review also offers a partnership program and sales scripts for selling client services. This course is available for a one-time fee of $997.

While this course is not a scam, it may be too advanced for those who are just starting out in business. It can be expensive and requires a lot of time and effort to learn. Additionally, there are many other marketing courses that are much less expensive and require less time to complete.

Iman is a young businessman who originally hails from Russia and currently lives in London. His company, IAG Media, has done well for him and he is an example of entrepreneurship in action. His story is inspirational, especially to those who want to start their own businesses.

Six Figure SMMA, also known as GrowYourAgency and most recently Agency Incubator, is an online course that teaches you how you can build your own social media marketing agency. It will help you generate leads for offline and online businesses by running marketing campaigns on Facebook and Instagram. It will teach you how to set up your own agency, get clients, and turn a profit.

Besides the course materials, you can also gain access to Gadzhi’s community of other entrepreneurs. There are also numerous webinars and live Q&A sessions that you can attend to learn from other successful entrepreneurs. These events can be a great way to meet other marketers and make friends.

The cost of this course is relatively high, but it is worth the investment if you are serious about starting your own marketing agency. You can take advantage of the 14-day money back guarantee if you are not satisfied with the course. However, you will have to meet certain criteria for a refund. You must have watched at least 20% of the course to be eligible for a refund.

Iman Gadzhi’s Agency Incubator

Agency Incubator is a course that helps you build your own social media marketing agency. It includes training on everything from client acquisition to lead generation. The program also offers a community of aspiring digital marketers. This community can help you stay motivated and focused on your goals. In addition, the program has full-time coaches who can answer your questions.

The program is split into seven weeks, each with a different step in building an agency. The first week focuses on mindset and provides a quick overview of the course. This includes discussions of the course, paradigms, and the business model. It also discusses finding your niche, opening a bank account, and the tools you’ll need. This week is only about 4 hours long, so it’s a quick introduction to the course.

In week two, Gadzhi introduces the marketing strategy and tactics that will allow you to grow your audience. He covers Facebook ads, SEO, and content marketing. In addition, he teaches you how to use analytics software to measure your progress. This will help you understand which strategies are working and which ones are not.

Next, Gadzhi explains how to set up your agency and hire employees. He also teaches you how to find clients and negotiate prices. He also covers legal issues and how to manage your team. The course also includes an app that will track your progress and help you with planning and scheduling.

Unlike other online courses, Gadzhi’s course is based on personal experience. He was born in Russia to a single mother, and grew up poor. His mother worked three jobs to make ends meet. Gadzhi was an unfocused and rebellious teenager, but he knew that his future depended on him becoming successful.

Gadzhi’s course promises financial freedom and provides a detailed roadmap for creating a six-figure SMMA. However, it is important to note that the testimonials and income reports on the sales page have not been independently verified. This program may not be a good fit for people who are looking to make fast money.

Iman Gadzhi is a young entrepreneur who launched his first company at the age of 17. He dropped out of high school and claims to have made $300,000 in his first year of business. He now runs his own companies in London and produces business content on his YouTube channel, which has over 180k subscribers.

Iman Gadzhi’s Agency Mastermind

Iman Gadzhi’s Agency Mastermind is a course that claims to teach you how to build your own social media marketing agency. It includes a course hub with playbooks on Google Ads, Facebook ads, and landing pages. It also features a community Q&A and live training sessions.

The course is divided into seven weeks, each week focusing on a different aspect of establishing a social media marketing agency. The first week focuses on mindset. Iman Gadzhi discusses paradigms, the business model, finding your niche, and opening a bank account. This week’s content is about four hours long.

In the second week of the course, Iman Gadzhi teaches you how to pitch and get clients. He also shows you how to build your team and negotiate deals. He explains how to use Upwork and how to find out the right time to call a client. In addition, he talks about how to do cold calling and how to follow up.

After pitching and getting clients, it is important to produce results for your clients. This is what will keep them coming back. In the third week of Agency Incubator, Iman Gadzhi focuses on how to deliver results for your clients. He explains how to measure performance, and he also shows you how to create a Facebook ad. He teaches you how to build an audience and increase spending.

The fourth week of the course focuses on creating a system to manage your business. This includes template contracts, agreements, and scripts. This will help you streamline your workflow and save time. It will also help you focus on the things that are most important to your business, such as growing your audience.

Iman Gadzhi’s Agency Bootcamp

Iman Gadzhi’s Agency Bootcamp is an online training program that teaches people how to start and run social media marketing agencies. It aims to give participants the tools they need to succeed, including training videos, templates, and coaching sessions. The program also includes a private Facebook group, where students can discuss their successes and ask questions.

To sign up for the course, you must provide your email address, phone number (mandatory), and your business and lifestyle goals. This information will help Iman determine if the course is right for you. Afterward, you’ll receive a welcome pack and an assignment. After completing the course, you’ll receive your Agency Navigator Fast Track membership. This platform will provide access to all of Iman’s courses, including Pen To Profit, Entrepreneur Productivity, and Apex.

It is important to remember that starting a social media marketing agency takes time and effort. In order to be successful, you’ll need a deep understanding of digital marketing and a strong desire to build a profitable business. It is also a good idea to have some business experience before starting your agency.

One of the most popular ways to make money on the internet is by starting a social media marketing agency. These businesses offer services such as content marketing, social media management, and website development to clients. While it may take some time to get started, there are many benefits to starting a social media marketing agency.

Iman Gadzhi is a digital entrepreneur and has created several training programs that teach people how to start and run a social media marketing agency. His training programs are based on his own agency and are designed to help people achieve their dreams of creating a successful online business. He claims to have built an agency that earns thousands of dollars every month.

Gadzhi has also launched other programs such as Six Figure SMMA and Agency Incubator. However, these courses look like they are no longer active and may have been replaced by Agency Navigator. Regardless, his programs are still worth checking out.

Although Iman Gadzhi’s training programs are legitimate, they should be used with caution. It is not easy to build a digital marketing agency, and it can be very stressful. If you’re not prepared for the challenges of running a business, it might be better to find a different opportunity.

How to Properly Repair Stucco

Stucco is critical in your home or building, protecting it from the elements and maintaining structural integrity. If your stucco is damaged, it needs to be repaired quickly to avoid further damage and safeguard the long-term stability of your property. For professional expertise, consult Stucco Repair Philadelphia.

Stucco Services

While hairline cracks are usually mended with caulking, other damage requires more in-depth repair. These are often caused by underlying issues that need to be addressed through remediation.

Stucco is very durable, but it can crack over time like any surface. Fortunately, the cracking that occurs is a normal part of a stucco’s lifespan and can be easily repaired.

When cracks begin to appear in your stucco, it is best to tackle them as soon as possible. The longer you wait, the more likely it is that the problem will get worse.

The first step in repairing any cracks or holes in your stucco is to determine why the damage occurred. If the stucco was installed improperly, a structural engineer should be brought in to evaluate the damage and offer advice on how to fix it.

If the cracks are a result of the structure settling or seismic changes, you will need to call in a foundation specialist. However, most of the cracks you see in your stucco are not due to these issues. They are caused by a variety of issues, including a wet mix or improper temperature settings during construction.

Hairline cracks are the most common type of crack and are often caused by the plaster expanding and contracting as it dries. These can be easy to repair using various caulking products. However, the problem with these cracks is that they will recur. These cracks lay pathways for moisture to seep behind the stucco and cause untold damage.

To fix these cracks, use QUIKRETE(r) Pre-Mixed Stucco Patch (No. 8650). This is a ready-to-use acrylic latex formula that can be used to make repairs of small holes and cracks in stucco surfaces up to 1/4″ (6 mm) thick. Before you apply the stucco patch, it’s best to press firmly with your palms over the damaged area. You want to ensure that the crack or hole is actually a crack and not just a spring. If it is a crack, you should then hammer and cold-chisel the area to widen it to about 1/4″ and bevel the sides. The chiseling should not disturb the surrounding intact stucco, but it is important to make sure you do not damage the underlying lath support. When you’ve applied the patch, allow it to cure for 24 hours before painting with a water-based paint.

Refinishing the Surface

When stucco is cared for properly, it is an attractive exterior material that can last for over a century. However, if it’s neglected, it can become damaged and begin to crack, crumble and rot. In addition to causing structural problems, this can lead to mold growth and water penetration that can damage the interior of your home or business. It’s best to repair stucco as soon as you notice cracks and holes to avoid further deterioration.

A fresh coat of paint can give your house or commercial property a new lease on life. It’s a relatively easy do-it-yourself project that most homeowners can complete themselves, but it does require some preparation. Before painting, the surface should be thoroughly pressure washed to remove loose paint and dirt. This will also prevent the paint from sticking to the surface and chipping or flaking.

Whether your stucco is painted or unpainted, it should be cleaned before starting the repainting process. This can be done with a hose and water or with a high-pressure power washer (3,000 – 3,100 psi). In either case, it’s important to wear safety goggles and work gloves as the pressure washer can create some dust and debris.

If the paint is peeling, a thorough cleaning will help to prevent moisture from penetrating and damaging the stucco. A masonry surface conditioner can be used to clean the stucco and help it repel rainwater and other elements.

Small, hairline cracks in the surface of your stucco can usually be painted over, but larger cracks and holes should be repaired before proceeding with a painting job. Use a caulk rated for exterior use to fill any cracks wider than a dime. Allow the caulk to dry according to the manufacturer’s instructions before applying a coat of primer and then a finish coat.

If you’re planning on painting the stucco yourself, it’s best to consult a painters that specialize in stucco. The process is more complex than painting other types of surfaces and it’s difficult for the average homeowner to achieve a professional-looking result without the right training and experience.

Remediating Issues

Stucco is a beautiful and popular home building material, but like anything, it doesn’t last forever. Stucco can be damaged by moisture intrusion, so homeowners need to look for signs of moisture damage and have them checked out by an expert. If the expert recommends remediation, it’s important to heed their advice as moisture damage can have serious consequences for your home.

Remediating stucco is a process of fixing the underlying issues that are leading to water damage in your home. It involves completely replastering the walls to ensure that any moisture infiltration is dealt with thoroughly. Remediation is more expensive than repair, so it’s understandable that people might only choose to have it done when absolutely necessary. However, it’s important to remember that continuing to postpone the need for remediation can cause further damage to your home and even lead to structural problems.

When you’re choosing a contractor to perform stucco remediation on your home, look for one that prioritizes professionalism and customer satisfaction. They should provide testimonials and be able to answer any questions you may have about the process. It’s also a good idea to find out about any other work they have performed on homes in the past so you can get an idea of their quality.

Moisture damage is most commonly found around windows, so your stucco contractor will begin their inspection by looking at those areas of the wall. If they notice any issues, they’ll begin the remediation process by stripping away the existing stucco. Once the underlying materials have been addressed, they’ll rebuild the wall with new stucco and apply a protective coating to prevent future damage.

Masonry was hired to do the stucco remediation on a home that was built in the 1990s. Masonry completed the job over the course of ten days, repairing all areas of the house that were affected by water damage. The homeowner decided to sell their house and needed to have the moisture problems fixed before they did so. This was the only way to ensure that they would receive a fair price from prospective buyers.

Adding a Fresh Coat of Paint

Once the major repairs are complete, it’s time to add a fresh coat of paint. As with any painting project, it’s important to prep the surface first. This includes cleaning and repairing any stains. For a stucco wall, stains can be caused by dirt, mold, efflorescence, or water damage. Cleaning the surface is easy enough — you just need to wash it and remove loose debris. However, if you notice moisture, mold or rot, you’ll want to consult a professional for remediation.

Begin by inspecting the stucco and looking for any blemishes that need to be repaired before painting. For example, you should check for rust stains or cracks in the concrete. If any of these are found, they should be filled in with a quality masonry caulk. Afterward, touch-up with an exterior latex paint will help even out the color.

It’s also a good idea to take the time to inspect the supporting framing for signs of rot or water intrusion. If the underlying sheathing and framing are affected, you’ll likely need to replace them. A complete replacement can be quite expensive, but it is a long-term solution that eliminates the water intrusion problem for good.

If you’re planning on painting your stucco, you should prepare the surface by washing it with a power washer and allowing it to dry completely. You should also be sure to remove any dust or dirt that has built up on the surface. You should also look for any areas of concern, like fading or peeling paint that may indicate moisture issues and require professional attention.

Before you begin patching cracks, make sure to examine the entire wall for any additional damage or rotting. This will help you determine how much repair work is required. For small hairline cracks, you can use an exterior latex caulk. It’s best to choose a caulk that matches the stucco color as close as possible.

Larger holes and cracks will need to be patched with a high-quality cement or stucco patching compound. Make sure you get a product that contains a waterproof additive to help prevent moisture penetration and rot. If the cracks are wide, you may need to back chisel them to ensure proper adhesion.

How to Repair a Deck

A hammer or pry bar can be used to remove nails and damaged boards. Then the replacement board should be measured and cut to size before being screwed in place.

Deck Repair

It’s important to check for rotting wood regularly. If you notice that an area feels soft or spongy, call Deck Repair Charleston SC professionals right away.

If you have soft or spongy spots on your deck, you may be dealing with rot. This is a common issue and should be addressed immediately to prevent the wood from breaking down.

Often, the problem is caused by water that soaks into the wood and creates a breeding ground for mildew or mold. If you catch it early, a simple cleaning and resealing will do the trick. However, if the damage has already occurred, you may need to replace the affected boards.

It is also possible that the rotted areas are caused by a loose ledger board, which is the piece of wood that attaches the deck to your house. If this is the case, it’s important to call a professional builder or home improvement specialist to ensure that the rest of your house’s framing is not compromised.

Loose deck posts are another common source of rot. This can be due to incorrect installation or a structural problem. A loose post can cause a serious problem and should be replaced immediately.

In addition to the epoxy, you will need a few other tools for this job: wood chisels and a hammer. These are used to remove any rotten areas of the deck. A drill machine with bits: These will be used to drill into the joist or decking board and make holes for screws or nails. Wood filler: This is used to fill the pits left by the rotted area. Once the wood filler dries, it can be sanded to make it smooth and even. Safety glasses: This is important to protect your eyes from the wood dust.

Once the rotted areas have been cleaned and filled, it is time to install the new boards. It’s a good idea to use treated lumber for this, as it will hold up better to the elements than untreated wood. You should also take the time to inspect your deck for any other issues that could contribute to rot, such as a leaky roof, poor gutter alignment, or a sprinkler system problem.

Cracked Planks

Over time, wood expands and shrinks slightly in response to moisture levels and temperature changes. This expansion and contraction puts stress on deck boards, which can lead to cracks. These cracks are unsightly and can also pose a safety risk, particularly for those who walk on the deck barefoot. Fortunately, it is fairly simple to repair cracked planks in a couple of different ways.

One option is to simply fill the crack. This can be done by using a putty knife to apply a layer of wood filler over the crack. This should be allowed to dry completely before walking on the board or cleaning it. A good-quality wood filler is stainable, so it will take on the color of the wood around it, making it easier to blend in and hide.

For larger cracks, you may want to consider replacing the board. This is not only a more permanent solution but can be more cost-effective as well, since the wood will need to be replaced anyway. To replace the board, carefully remove it from the deck with a hammer and prybar. Then, drill the new board into the joist with the same screw holes and use larger screws to avoid weakening the joist.

Alternatively, you can try splicing in a new piece of board to cover the existing one. This can be more difficult than just filling in the crack, but it can still be done with a bit of skill. To splice in a new piece of wood, first clean the area to be worked on with a cloth doused in mineral spirits. This will ensure that the new glue will adhere properly to the board. Next, tape over the edges of the board on both sides. This will catch any epoxy oozing out of the bottom and make cleanup much simpler.

If you prefer not to use splicing, you can always try using a penetrating epoxy instead. This type of epoxy will draw into the cracks, saturating and sealing all exposed wood fibers. This method is typically faster and more effective than just filling the cracks. Be sure to follow the manufacturer’s instructions for mixing and applying, and work in a well-ventilated area.

Broken Railings

Many porch decks feature railings that make stairs safer for people. The most basic railings consist of a handrail with hardware that secures it to the wall. But most have more elaborate balusters that run in vertical lines from the handrail to the base rail. When these are broken or missing, the safety of the staircase is compromised. The good news is that repairing wood railings is fairly simple.

The first step is assessing the damage and deciding what needs to be fixed. Sometimes it may be a case of replacing an entire railing, while other times it might be a matter of a few loose screws or even just replacing a single broken baluster.

Once the broken pieces have been removed, loosen and remove any nails that remain. Then you can start to work on securing the new ones in place. It is important that you use the right type of glue for this. Ordinary wood glue will not work; you will need something that dries into a hard, glassy substance that takes on the appearance of the original wood.

First, clean out any debris from the crack or split in the banister using a putty knife. Then dry fit the new piece; if it fits tightly, you can go ahead and glue it in place. If it doesn’t, carefully examine the break to see what is keeping it from closing up. It is likely that you will be able to pull out a few fibers that you can then chisel away.

Now, choose a replacement baluster of the same width and species of wood as the one that was broken. If the baluster is part of a larger section of the railing, cut a new board that is long enough to center on the next joist over and then nail it in place. Make sure that the new board is primed on all sides and then painted or stained (Furst uses a stain that penetrates the surface rather than just coating it) before securing it with wood glue. This will prevent the wood from absorbing moisture, which can cause it to split and crack again.

Damaged Posts

The wood posts that support the deck are prone to damage from both weather and normal use. If your posts become splintered or cracked, it is time to replace them. Fortunately, replacing deck posts is relatively simple. You can find new wood posts at a hardware store that match the color and type of your existing boards. Before you head out to buy replacements, take measurements of your existing posts and the width and height of your joists so that you know exactly what lengths and sizes to purchase for your new boards. It is always better to get a little longer than too short if you are unsure what size board you need.

Unlike rotting planks, which can be repaired simply by sanding and staining, damaged posts must be replaced. A professional should inspect your deck to ensure that the underlying support structure is intact before replacing any posts. Erosion is another major concern that can affect both wooden and concrete deck footings. Erosion can occur due to changes in the slope of your yard, drainage issues, and even landscaping changes. Erosion can loosen or break posts and cause the footings to sink. It is important to fix erosion problems before they cause major damage to a deck.

It is not uncommon for nails and screws to disappear over the years. While it may seem like a minor issue, missing screws can actually weaken stairs and railings and lead to structural problems. A professional should check the integrity of your deck to make sure that all necessary nails and screws are in place.

If your existing posts are set in concrete footings, you can repair them with EZ Mender post repair brackets. These are available at most home improvement stores. These are U-shaped jackets that fit around the base of a deck post. They have a sharp point on one end and a nailing lug on the other. They are installed by hammering in the end with a 3-pound sledge hammer. EZ Menders also come in galvanized steel, which protects against rust.

The Importance of Bulkheads Construction

Whether you’re building a commercial project or your home, bulkheads are a smart way to protect your property from erosion. They are also an economical investment.

Bulkheads Construction

Bulkheads can be built from a variety of materials. They can be piled and anchored (like sheet piling) or supported by gravity structures like rock-filled timber cribs. Read on Bulkheads Construction Charleston SC to learn more.

A bulkhead is a type of wall that is installed abeam (side-to-side) in the hull of a ship or within an airplane fuselage. They are typically used to partition areas of a vessel or aircraft into different areas, such as cargo holds and passenger cabins.

Bulkheads are constructed in many different ways. They are made from a variety of materials, such as steel, aluminum, and concrete. They can be welded or glued together to form a structural unit. They are then often plated with a protective coating, such as zinc or copper.

The strength of a bulkhead depends on a variety of factors, including its thickness and construction. It also needs to be reinforced to ensure its longevity.

To achieve the desired level of strength, a bulkhead is welded to the side and bottom plates of the ship’s hull, then further reinforced with stiffeners. Stiffeners are typically angled, bulb-shaped, or flat sections that are welded onto the bulkhead and its sides.

Another important aspect of a bulkhead’s strength is its watertightness. This is important for the safety of passengers on board and to avoid flooding in the event of a hull breach.

Additionally, a bulkhead’s watertightness can help prevent grounding, which could cause the compartment to fill up with water. It can also help keep a fire from spreading to other parts of the ship.

Whether a bulkhead is made of metal, plastic, or some other material, it is usually inspected to make sure that it is watertight. It may be hose tested or pressure tested to ensure that it does not leak.

In some cases, a bulkhead may be fitted with a firestop to protect it from fire. This is especially true on ships and some types of airplanes.

A bulkhead may also be designed to allow passage of a firefighting water hose without damaging the hull. This is particularly useful on ships, where fires are most common.

Because of the importance of a bulkhead’s strength, it should be designed carefully and inspected regularly. This will ensure that it will last for a long time and not need to be replaced. It will also protect the ship and its passengers from a fire or any other threat.

Watertight bulkheads are important for the stability of a ship and their ability to withstand damage. These bulkheads segregate the machinery spaces and cargo holds so that they are not flooded during flooding or fire. This helps the vessel maintain its buoyancy, which is necessary for safe returns to port without catastrophic damage.

The construction of these bulkheads is highly important and involves many factors. These include their position, their uniqueness based on floodable length calculations, and the structural design of the ship.

Most bulkheads are transverse in orientation, but some ships also have longitudinal bulkheads that run fore and aft. This allows a ship to retain its buoyancy, even during flooding along one side, but it can lead to a list if multiple compartments are flooded.

To reduce the possibility of flooding in a watertight compartment, the plating of these bulkheads is made stronger and thicker. The thickness of these bulkheads increases as the ship gets deeper, and this strengthens them against hydrostatic pressure.

In addition to strengthening the watertight bulkhead, the plating is welded in place so that there are no gaps that can let water in. Similarly, the plating of these bulkheads also stiffens to prevent any flexing or deformation during loading.

Watertight bulkheads also have doors that allow access to the compartments. These doors are of the sliding or hinged type and must be capable of being operated from both sides of the bulkhead.

They must be able to remain closed when the ship is at sea, and they should be equipped with visual indicators that tell when the doors are open or shut. They must also be fitted with an audible alarm that lets the skipper know when the door is shut or opened.

What You Need to Know About Exterior House Paint

exterior house paint

If you are looking to redo your home’s exterior paint, there are several factors to consider. You need to consider things such as the type of siding you have, the finish you are going for, the color of the undertone, the gloss or high gloss, and whether or not you want a water-based or oil-based finish.

Gloss or high-gloss

When you want to paint your home, you should know about the different finishes available. Gloss and high-gloss exterior paint are great for accent walls, railings, and doors. They are also ideal for areas that need a tough, durable coating. For more ideas and design, check out Painters website.

The exterior of your home is subjected to many stress factors. It may get wet or exposed to heavy activity. If you are considering painting your house, you will want to choose a finish that is able to withstand the wear and tear. High-gloss and satin are two finishes that work well for exterior paint.

Exterior paint is a tough, durable coating that will last for years. Because it bonds to the surface, it will help prevent cracking and flaking. In addition, it will help your home stay dry and maintain its color.

You can easily determine the sheen of your paint by examining how it reacts to sunlight. A higher sheen will reflect more light. A lower sheen will absorb more. This sheen is important because it will affect how your paint performs.

Water-based vs oil-based

When you’re shopping for exterior house paint, there are many options available. It’s important to choose a paint that will last long and look good. But before you go out and buy that expensive paint, it’s important to know the difference between water-based and oil-based paint.

Water-based exterior paint can be applied on hardboard siding, vinyl siding, and most masonry. This type of paint offers a longer-lasting, softer finish that’s also more resistant to damage, fading, and UV light.

Oil-based exterior paint is usually preferred for larger areas such as a home’s siding or bricks. It’s hard to beat the high gloss of an oil-based paint.

However, water-based paints have a number of advantages. They are more flexible, easier to clean, and have low odor. Plus, they’re safer to use with ventilation.

In addition, water-based paints retain color for a longer period of time. Since they have less volatile organic compounds, they emit fewer harmful chemicals into the air.

Siding type

There are a number of different types of siding available. Each type has its own advantages and disadvantages. Choose the one that is best for your home.

Choosing the right kind of siding for your home will have a significant impact on the look and feel of your exterior. It also plays a big role in protecting your house against the elements. The right type can make your home stand out and last longer.

Whether you want wood, metal or some other type, you should choose the one that matches your vision for your home. Wood, for example, comes in many different styles and can be stained or painted to suit your taste.

Metal siding is a great option for any home. It can be painted, but it doesn’t retain heat well during winter. Adding insulation can reduce heating bills.

Siding materials are available in a wide variety of colors. CertainTeed offers 11 vinyl collection types, including vertical and horizontal. Some manufacturers offer custom colors.

Undertone

If you want to make the right choice when painting your exterior, you’ll need to be aware of paint color undertones. This is important because the undertones of paint colors can affect how your home looks.

For instance, a gray exterior with a blue undertone will look colder. In contrast, a gray with a green undertone will look warmer. It’s best to choose an undertone that complements the rest of your house.

The undertone of your paint can also affect your home’s curb appeal. To start, select three or four color choices. You don’t need to be a paint expert to decide on the best color. However, if you have questions, you may want to create a sample board and move it around your home.

Paint manufacturers list undertones on the back of their color swatches. Using the color wheel is another way to identify undertones.

Taking the time to choose paint colors with the same undertone will help you achieve a coordinated look. This will also improve the curb appeal of your home.

Roof Replacement – Make a Good First Impression

Re-roofing your house by increases your home’s curb appeal and enhances your family’s energy efficiency and security. This is especially important if you live in an area with harsh weather conditions.

Roofing

The cost of replacing a roof depends on a number of factors. It is important to compare several quotes and choose a reliable contractor like Roof Replacement to do the job. The overall cost of roofing is based on materials, labor, and permits. Most homeowners spend between $5,203 and $10,119. Using a home equity loan to pay for the entire project can spread out the upfront costs over time. Depending on your budget, you may also need to consider the cost of an extended warranty.

A high-quality roof replacement will add thousands of dollars to the value of your home. If you have a home equity line of credit, you might be able to pay for the project without any interest.

Choosing a high-quality product will also help you save money in the long run. Materials can increase up to 40% of the total cost of your project.

Your location is another major factor. Certain areas of the country have high temperatures and limited supply of materials. In some states, for example, the price of a new roof can be more expensive than other regions.

Re-roofing increases energy efficiency. Re-roofing your home is an excellent time to consider a few energy efficiency measures. It is also a good idea to add insulation to your attic to save on heating and cooling costs in the long term.

The roofing industry is abuzz about green and energy efficient roofing products and techniques. You can expect to see more and more energy efficient products hitting the market each month. In fact, some states offers tax rebates for thermal insulation. Several states are also considering a solar shingles scheme to offset the cost of rooftop solar panels.

If you’re going to re-roof your home, you should first learn more about your roofing options. Many companies can provide a free estimate of your roofing needs. When you’re done researching, shop for a contractor that provides the best service and pricing. Some companies will even install an LED light in your attic to maximize daylighting.

Re-roofing restores the curb appeal of your home. If you are a homeowner looking to make a good first impression on visitors, you need to look no further than your roof. Not only does it guard your home against damage from the elements, it is also one of your property’s most visually prominent components. Fortunately, roof replacement is relatively easy and inexpensive. There are several options, including steel, aluminum, and tile roofing.

Choosing the right material is a key part of the process. Metal is especially durable and requires little maintenance. A well-maintained roof will not only protect your home from the weather, but it will also increase your home’s value. Plus, new roofs make homes look great.

Having a well-maintained roof is also smart if you plan to sell your home. In addition to a new roof, you can also upgrade your gutters and downspouts to catch any leaks and prevent mold and mildew. Potential buyers want to know that you took care of your investment.

Re-roofing restores safety and security for family and everyone in the house. Using a re-roofing method will give your home a longer lifespan. Re-roofing is a great option for those who have minor damage to their roof. It is a cheaper way to replace your roof than buying a whole new roof. This method also gives your roof a new look and provides protection.

If you live in a high-rain area, a damaged roof can cause many problems. The best time to re-roof your home is when the roof is nearing the end of its lifespan. Replacing a roof can cost a lot of money. A re-roof will allow you to save money on material costs and labor.

When you decide to re-roof your home, it is a good idea to contact an architect. An architect can offer a good estimation of the costs. Architects can also help you prevent any structural damage to your home.

Depending on your house type, the costs for re-roofing can vary. For example, a single story home will be cheaper to re-roof than a two-story home. Also, the slope of your home can affect the costs. Steep houses require more time and labor for re-roofing.