Stucco is critical in your home or building, protecting it from the elements and maintaining structural integrity. If your stucco is damaged, it needs to be repaired quickly to avoid further damage and safeguard the long-term stability of your property. For professional expertise, consult Stucco Repair Philadelphia.
While hairline cracks are usually mended with caulking, other damage requires more in-depth repair. These are often caused by underlying issues that need to be addressed through remediation.
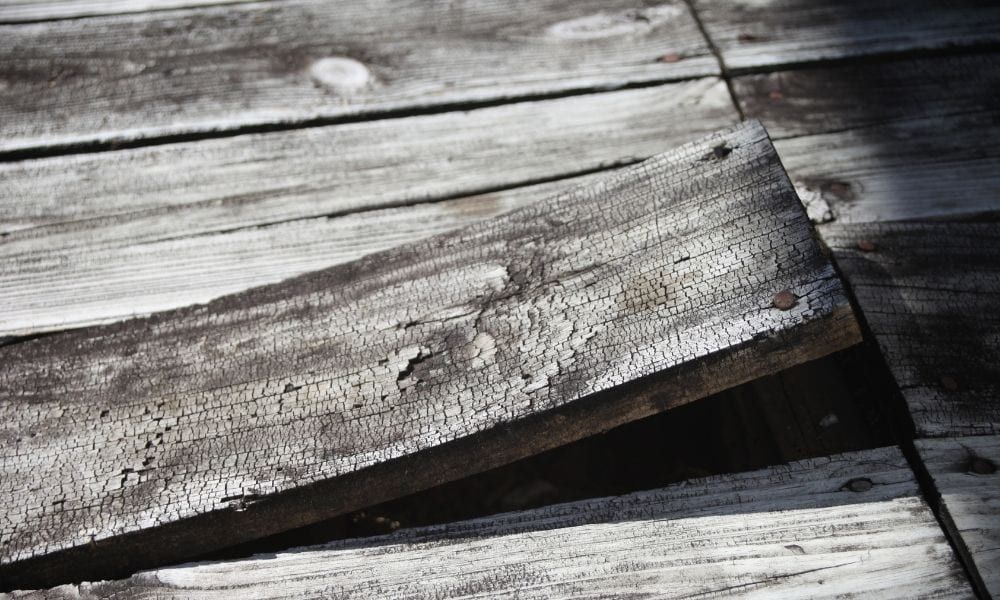
Stucco is very durable, but it can crack over time like any surface. Fortunately, the cracking that occurs is a normal part of a stucco’s lifespan and can be easily repaired.
When cracks begin to appear in your stucco, it is best to tackle them as soon as possible. The longer you wait, the more likely it is that the problem will get worse.
The first step in repairing any cracks or holes in your stucco is to determine why the damage occurred. If the stucco was installed improperly, a structural engineer should be brought in to evaluate the damage and offer advice on how to fix it.
If the cracks are a result of the structure settling or seismic changes, you will need to call in a foundation specialist. However, most of the cracks you see in your stucco are not due to these issues. They are caused by a variety of issues, including a wet mix or improper temperature settings during construction.
Hairline cracks are the most common type of crack and are often caused by the plaster expanding and contracting as it dries. These can be easy to repair using various caulking products. However, the problem with these cracks is that they will recur. These cracks lay pathways for moisture to seep behind the stucco and cause untold damage.
To fix these cracks, use QUIKRETE(r) Pre-Mixed Stucco Patch (No. 8650). This is a ready-to-use acrylic latex formula that can be used to make repairs of small holes and cracks in stucco surfaces up to 1/4″ (6 mm) thick. Before you apply the stucco patch, it’s best to press firmly with your palms over the damaged area. You want to ensure that the crack or hole is actually a crack and not just a spring. If it is a crack, you should then hammer and cold-chisel the area to widen it to about 1/4″ and bevel the sides. The chiseling should not disturb the surrounding intact stucco, but it is important to make sure you do not damage the underlying lath support. When you’ve applied the patch, allow it to cure for 24 hours before painting with a water-based paint.
Refinishing the Surface
When stucco is cared for properly, it is an attractive exterior material that can last for over a century. However, if it’s neglected, it can become damaged and begin to crack, crumble and rot. In addition to causing structural problems, this can lead to mold growth and water penetration that can damage the interior of your home or business. It’s best to repair stucco as soon as you notice cracks and holes to avoid further deterioration.
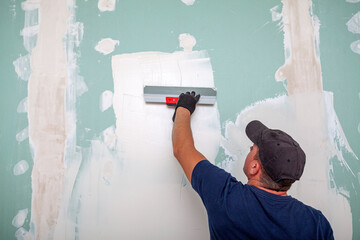
A fresh coat of paint can give your house or commercial property a new lease on life. It’s a relatively easy do-it-yourself project that most homeowners can complete themselves, but it does require some preparation. Before painting, the surface should be thoroughly pressure washed to remove loose paint and dirt. This will also prevent the paint from sticking to the surface and chipping or flaking.
Whether your stucco is painted or unpainted, it should be cleaned before starting the repainting process. This can be done with a hose and water or with a high-pressure power washer (3,000 – 3,100 psi). In either case, it’s important to wear safety goggles and work gloves as the pressure washer can create some dust and debris.
If the paint is peeling, a thorough cleaning will help to prevent moisture from penetrating and damaging the stucco. A masonry surface conditioner can be used to clean the stucco and help it repel rainwater and other elements.
Small, hairline cracks in the surface of your stucco can usually be painted over, but larger cracks and holes should be repaired before proceeding with a painting job. Use a caulk rated for exterior use to fill any cracks wider than a dime. Allow the caulk to dry according to the manufacturer’s instructions before applying a coat of primer and then a finish coat.
If you’re planning on painting the stucco yourself, it’s best to consult a painters that specialize in stucco. The process is more complex than painting other types of surfaces and it’s difficult for the average homeowner to achieve a professional-looking result without the right training and experience.
Remediating Issues
Stucco is a beautiful and popular home building material, but like anything, it doesn’t last forever. Stucco can be damaged by moisture intrusion, so homeowners need to look for signs of moisture damage and have them checked out by an expert. If the expert recommends remediation, it’s important to heed their advice as moisture damage can have serious consequences for your home.
Remediating stucco is a process of fixing the underlying issues that are leading to water damage in your home. It involves completely replastering the walls to ensure that any moisture infiltration is dealt with thoroughly. Remediation is more expensive than repair, so it’s understandable that people might only choose to have it done when absolutely necessary. However, it’s important to remember that continuing to postpone the need for remediation can cause further damage to your home and even lead to structural problems.
When you’re choosing a contractor to perform stucco remediation on your home, look for one that prioritizes professionalism and customer satisfaction. They should provide testimonials and be able to answer any questions you may have about the process. It’s also a good idea to find out about any other work they have performed on homes in the past so you can get an idea of their quality.
Moisture damage is most commonly found around windows, so your stucco contractor will begin their inspection by looking at those areas of the wall. If they notice any issues, they’ll begin the remediation process by stripping away the existing stucco. Once the underlying materials have been addressed, they’ll rebuild the wall with new stucco and apply a protective coating to prevent future damage.
Masonry was hired to do the stucco remediation on a home that was built in the 1990s. Masonry completed the job over the course of ten days, repairing all areas of the house that were affected by water damage. The homeowner decided to sell their house and needed to have the moisture problems fixed before they did so. This was the only way to ensure that they would receive a fair price from prospective buyers.
Adding a Fresh Coat of Paint
Once the major repairs are complete, it’s time to add a fresh coat of paint. As with any painting project, it’s important to prep the surface first. This includes cleaning and repairing any stains. For a stucco wall, stains can be caused by dirt, mold, efflorescence, or water damage. Cleaning the surface is easy enough — you just need to wash it and remove loose debris. However, if you notice moisture, mold or rot, you’ll want to consult a professional for remediation.
Begin by inspecting the stucco and looking for any blemishes that need to be repaired before painting. For example, you should check for rust stains or cracks in the concrete. If any of these are found, they should be filled in with a quality masonry caulk. Afterward, touch-up with an exterior latex paint will help even out the color.
It’s also a good idea to take the time to inspect the supporting framing for signs of rot or water intrusion. If the underlying sheathing and framing are affected, you’ll likely need to replace them. A complete replacement can be quite expensive, but it is a long-term solution that eliminates the water intrusion problem for good.
If you’re planning on painting your stucco, you should prepare the surface by washing it with a power washer and allowing it to dry completely. You should also be sure to remove any dust or dirt that has built up on the surface. You should also look for any areas of concern, like fading or peeling paint that may indicate moisture issues and require professional attention.
Before you begin patching cracks, make sure to examine the entire wall for any additional damage or rotting. This will help you determine how much repair work is required. For small hairline cracks, you can use an exterior latex caulk. It’s best to choose a caulk that matches the stucco color as close as possible.
Larger holes and cracks will need to be patched with a high-quality cement or stucco patching compound. Make sure you get a product that contains a waterproof additive to help prevent moisture penetration and rot. If the cracks are wide, you may need to back chisel them to ensure proper adhesion.